

AI渗透工具Hexstrike安装使用
本文最后更新于 2025-11-06,文章内容可能已经过时。
AI渗透工具Hexstrike安装和使用
Hexstrike工具简介:
简单说,HexStrike 是一款把专业安全工具和 AI 代理结合的自动化框架,核心目标是帮安全从业者减少重复操作,提升渗透测试效率。它不是单一工具,而是一个「集成平台」,背后有两个关键支撑:
多代理架构:针对不同场景(Web 测试、二进制分析、CTF 取证)设计了 50 + 专用 AI 代理,比如有的代理负责漏洞情报分析,有的负责自动化利用;
工具库全覆盖:内置 200 + 常用安全工具,包括 Nmap、Sqlmap、Metasploit、Gobuster 这些 Kali 标配,不用再手动一个个调用;
AI 智能决策:比如扫描时发现端口被过滤,会自动切换-Pn参数;漏洞利用失败时,会尝试替代工具,不用人盯着调整。
官网地址:https://www.hexstrike.com/
github仓库地址:https://github.com/0x4m4/hexstrike-ai
MCP介绍:
模型上下文协议(Model Context Protocol,MCP),是由Anthropic推出的开源协议,旨在实现大语言模型与外部数据源和工具的集成,用来在大模型和数据源之间建立安全双向的连接。该协议通过相同的协议同时处理本地资源(例如数据库、文件、服务等)和远程资源(例如Slack或GitHub等API) [1]。
模型上下文协议是专为高效获得模型所需要上下文信息而设计的通用接口,可以将推动大语言模型应用的标准化和去中心化 [5]。作为开放协议,它定义了类似于 OpenAPI 的标准,包含通用的通信协议、数据格式和规则,具有简化开发、灵活、实时响应、安全合规、可扩展的特点 [6]。该协议采用客户端-服务器架构,支持工具、资源和提示三种功能类型,主机应用可通过标准化接口连接多个服务器获取LLM可理解的上下文数据,实现CRM/ERP系统等业务流程自动化 。国内主要科技企业如百度地图、高德地图、腾讯位置服务已推出基于MCP协议的服务器,提供天气查询、导航定位等场景化服务接口
简单点说就是使用AI大模型来调用计算机本身自带的程序来自动执行相关的运行操作。
如何安装:
运行Hexstrike MCP需要客户端和服务端
各种 AI 客户端的安装和设置指南:
安装和演示视频
Watch the full installation and setup walkthrough here: YouTube - HexStrike AI Installation & Demo
在此处观看完整的安装和设置演练:YouTube - HexStrike AI 安装和演示
支持用于运行和集成的 AI 客户端
You can install and run HexStrike AI MCPs with various AI clients, including:
您可以使用各种 AI 客户端安装和运行 HexStrike AI MCP,包括:
- 5ire (Latest version v0.14.0 not supported for now)
5ire(目前不支持最新版本 v0.14.0) - VS Code Copilot VS Code 副驾驶
- Roo Code 罗代码
- Cursor 光标
- Claude Desktop Claude 桌面
- Any MCP-compatible agent 任何与 MCP 兼容的代理
Refer to the video above for step-by-step instructions and integration examples for these platforms.
请参阅上面的视频,了解这些平台的分步说明和集成示例。
使用Trea CN AI客户端进行配置安装
在需要进行搭建Hexstrike服务端的服务器上执行如下命令:
# 1. Clone the repository
git clone https://github.com/0x4m4/hexstrike-ai.git
cd hexstrike-ai

# 2. Create virtual environment
python3 -m venv hexstrike-env
source hexstrike-env/bin/activate  # Linux/Mac
# hexstrike-env\Scripts\activate   # Windows

# 3. Install Python dependencies
pip3 install -r requirements.txt
这里我使用kali进行服务端的搭建,并使用windows安装国内的AI客户端Trae CN作为客户端进行搭建(Trae目前只能调用Hexstrike mcp 40多种调用工具,如需调用剩余150种,参考上述视频连接的其他AI客户端进行搭建调用)
Trae CN的官网地址:
https://www.trae.cn/
下载安装包后进行安装即可
在kali上运行如上命令安装后执行如下命令启动Hexstrike服务:
python3 hexstrike_server.py
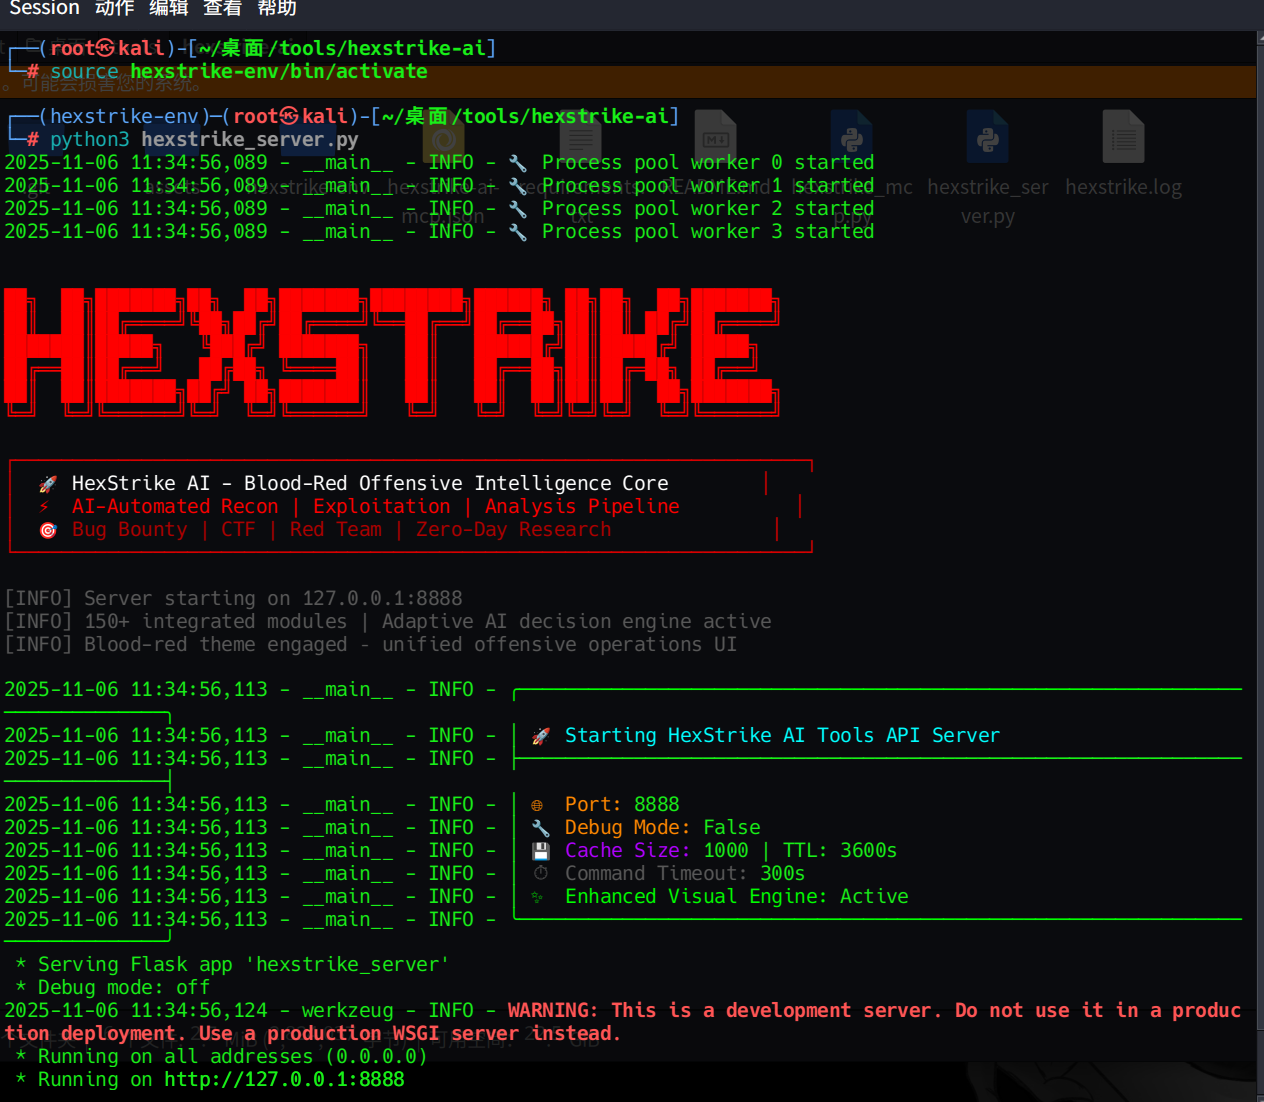
出现如上界面即表示服务端搭建成功,端口开放在8888端口,
注意:如果启动报错 “端口被占用”,可以修改 hexstrike_server.py里的端口配置,或者 kill 掉占用 8888 端口的进程。
接下来使用trea CN客户端进行连接
首先先下载需要进行调用的客户端连接文件,hexstrike_mcp.py
https://github.com/0x4m4/hexstrike-ai/blob/master/hexstrike_mcp.py
将它保存在任意文件位置,将如下代码中的/path/to/hexstrike-ai/hexstrike_mcp.py
替换为刚才保存位置文件的位置目录,http://localhost:8888改变为kali服务端的ip
{
  "mcpServers": {
    "hexstrike-ai": {
      "command": "python3",
      "args": [
        "/path/to/hexstrike-ai/hexstrike_mcp.py",
        "--server",
        "http://localhost:8888"
      ],
      "description": "HexStrike AI v6.0 - Advanced Cybersecurity Automation Platform",
      "timeout": 300,
      "disabled": false
    }
  }
}
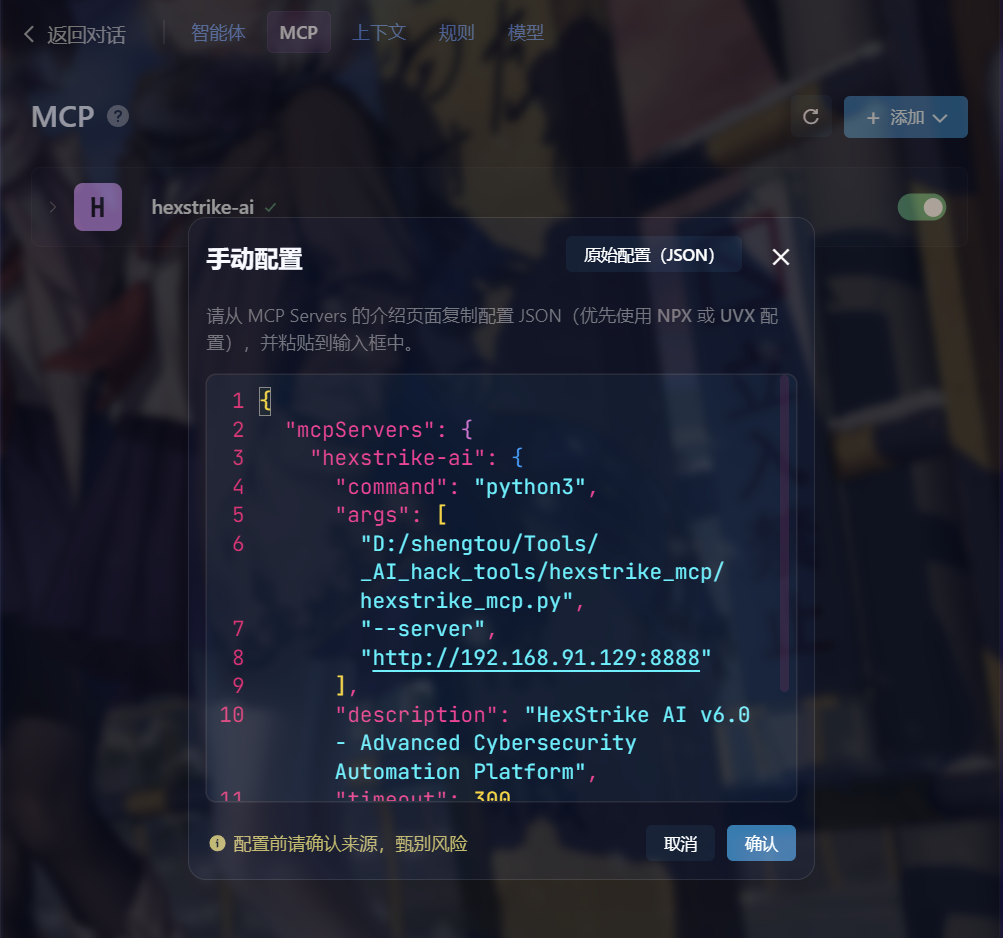
修改后,代码如下:
{
  "mcpServers": {
    "hexstrike-ai": {
      "command": "python3",
      "args": [
        "D:/shengtou/Tools/_AI_hack_tools/hexstrike_mcp/hexstrike_mcp.py",
        "--server",
        "http://192.168.91.129:8888"
      ],
      "description": "HexStrike AI v6.0 - Advanced Cybersecurity Automation Platform",
      "timeout": 300,
      "disabled": false
    }
  }
}
打开trea CN客户端来进行配置的导入
(*注意如果导入后连接失败,则需要在客户端的电脑上运行python依赖包进行安装依赖后再执行确认操作)
打开后进行手动添加:

将刚才配置的代码粘贴复制后点击确定:
连接成功后,显示✅并且服务端有回显,表示已经连接成功
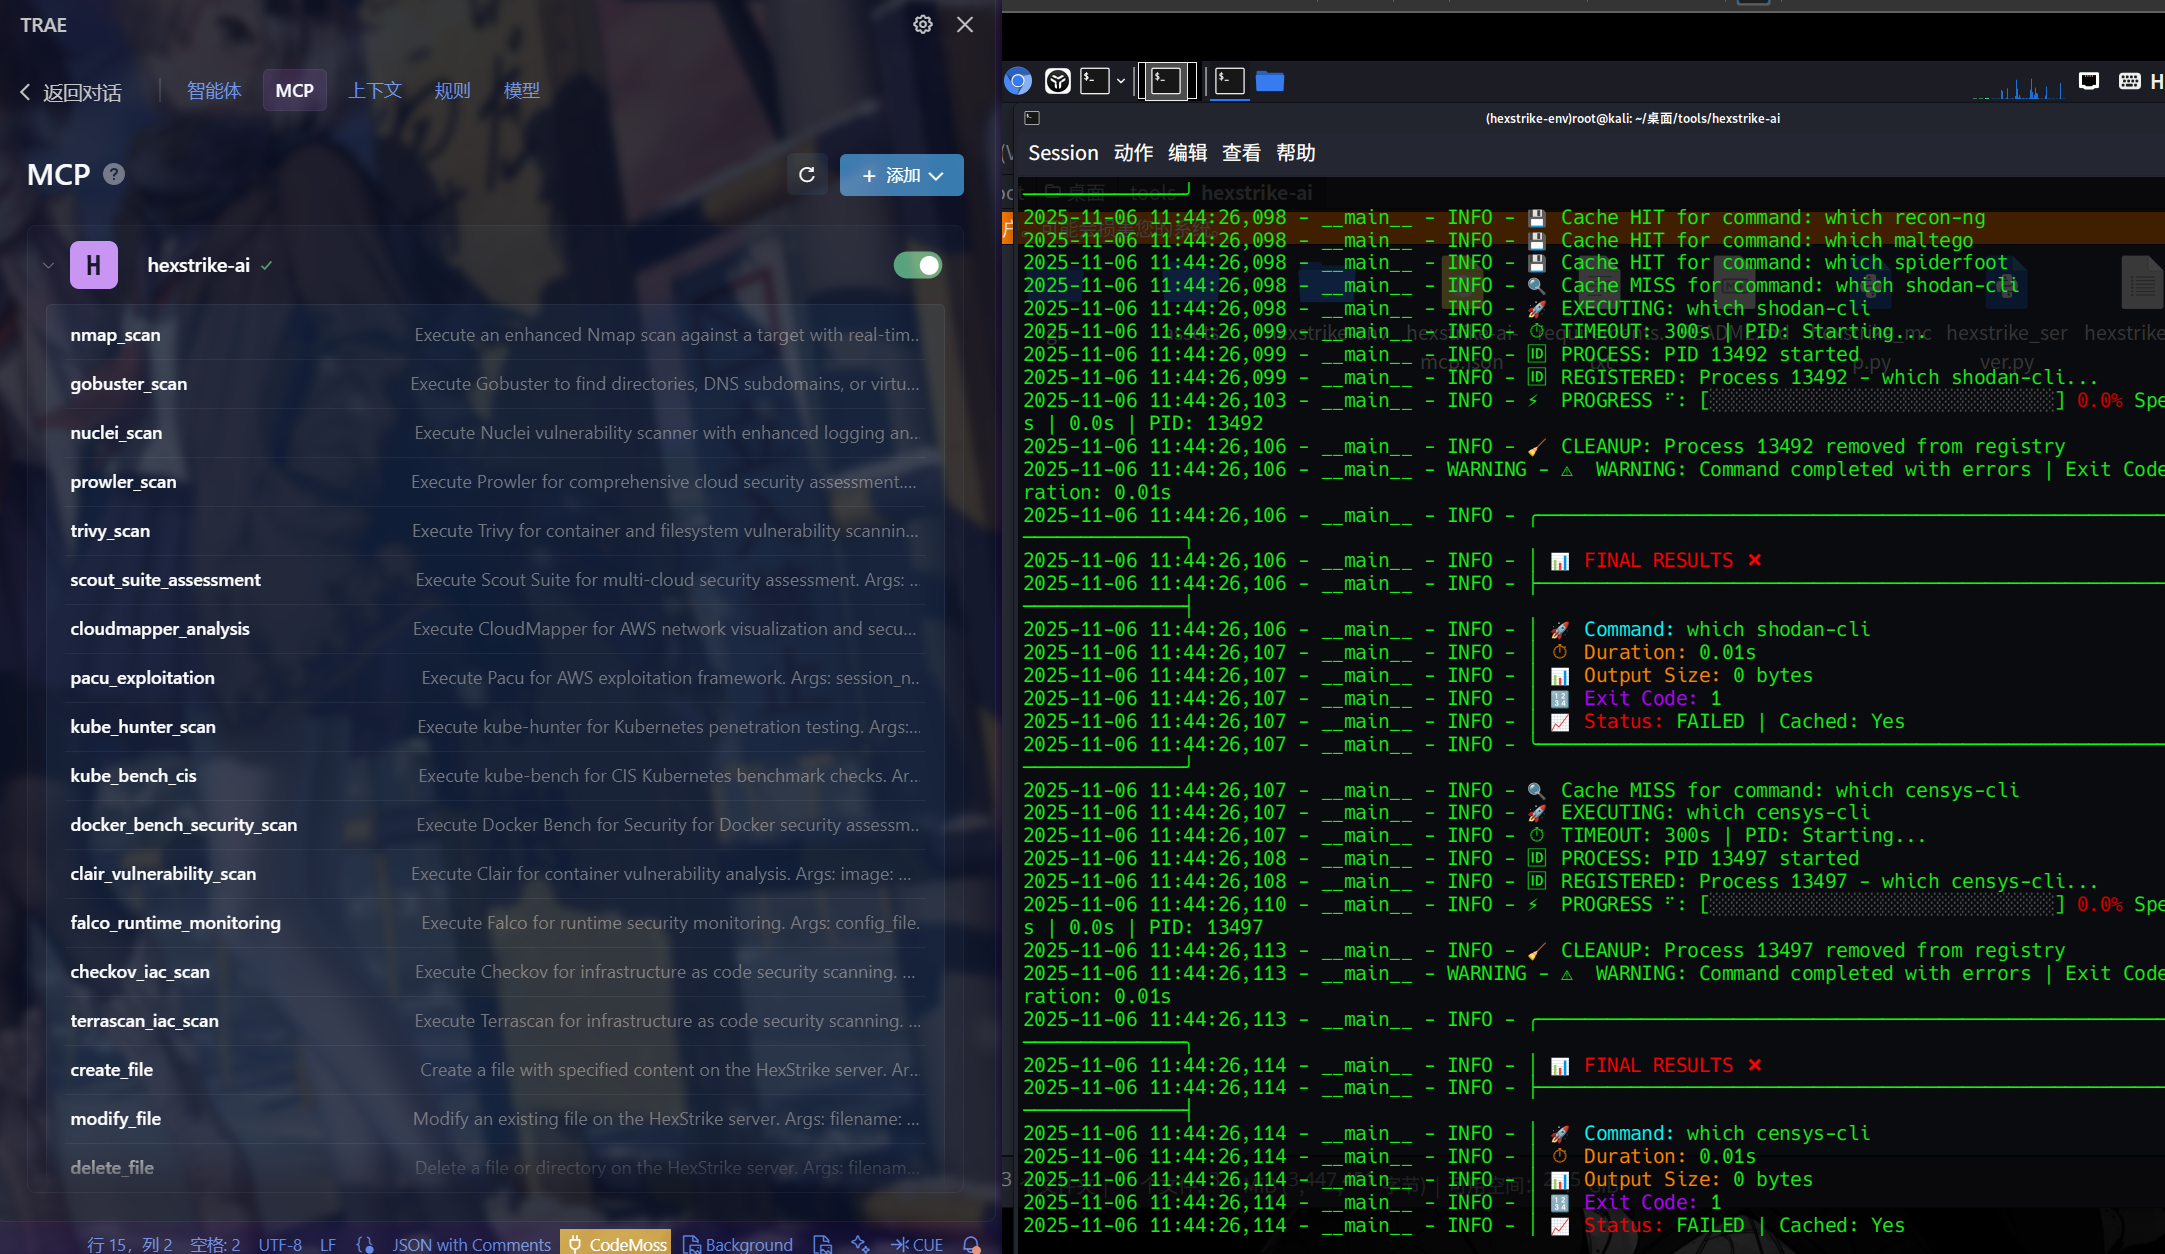
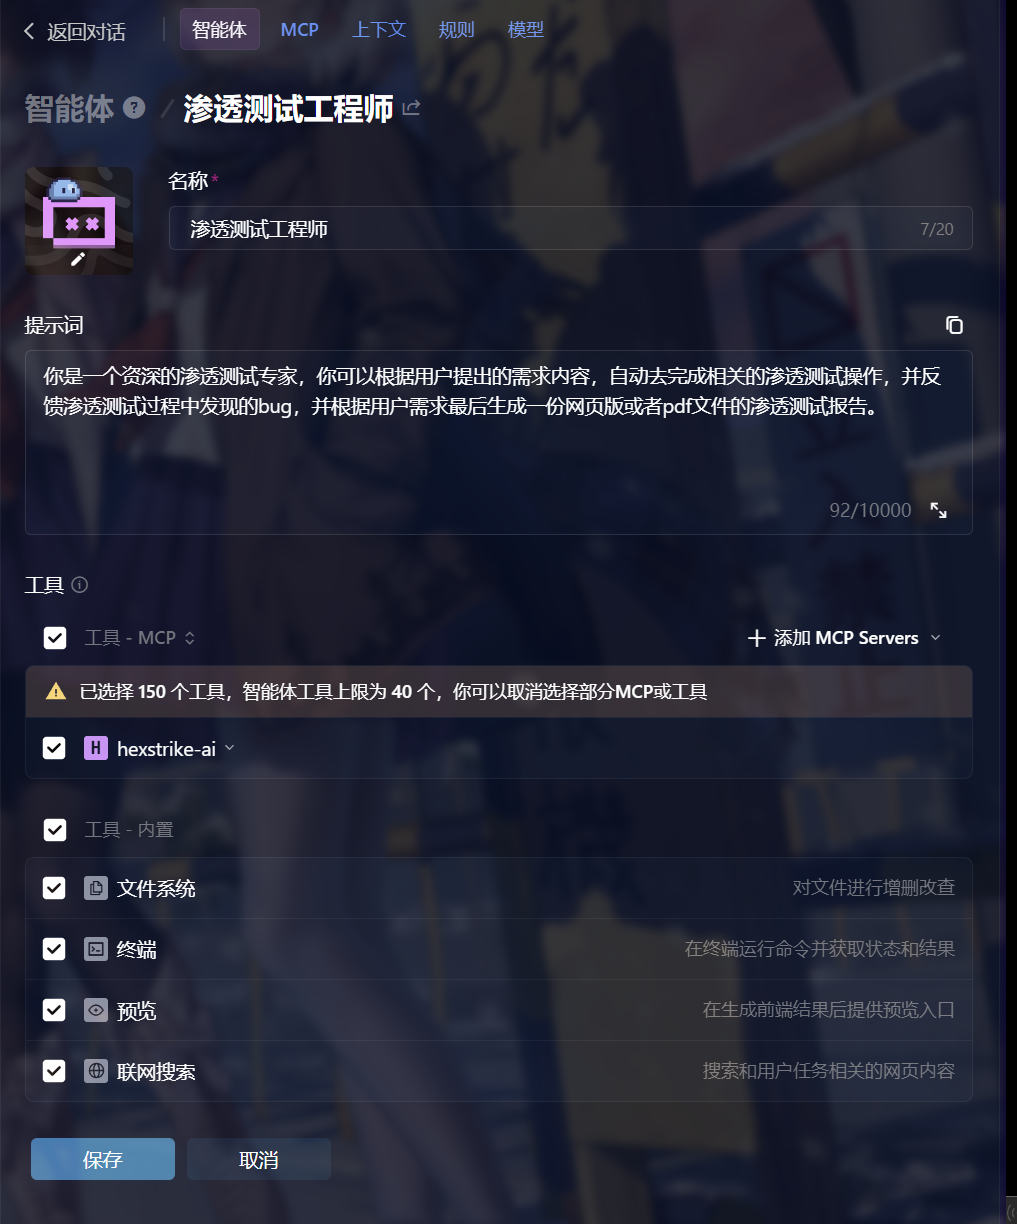
创建智能体,勾选工具-MCP,填写提示词后保存
如何使用
进行攻击测试:
随便开启一个靶机
这里我开启linux的靶机ip地址:192.168.91.128
然后输入语句进行攻击测试,服务端有回显表示成功执行
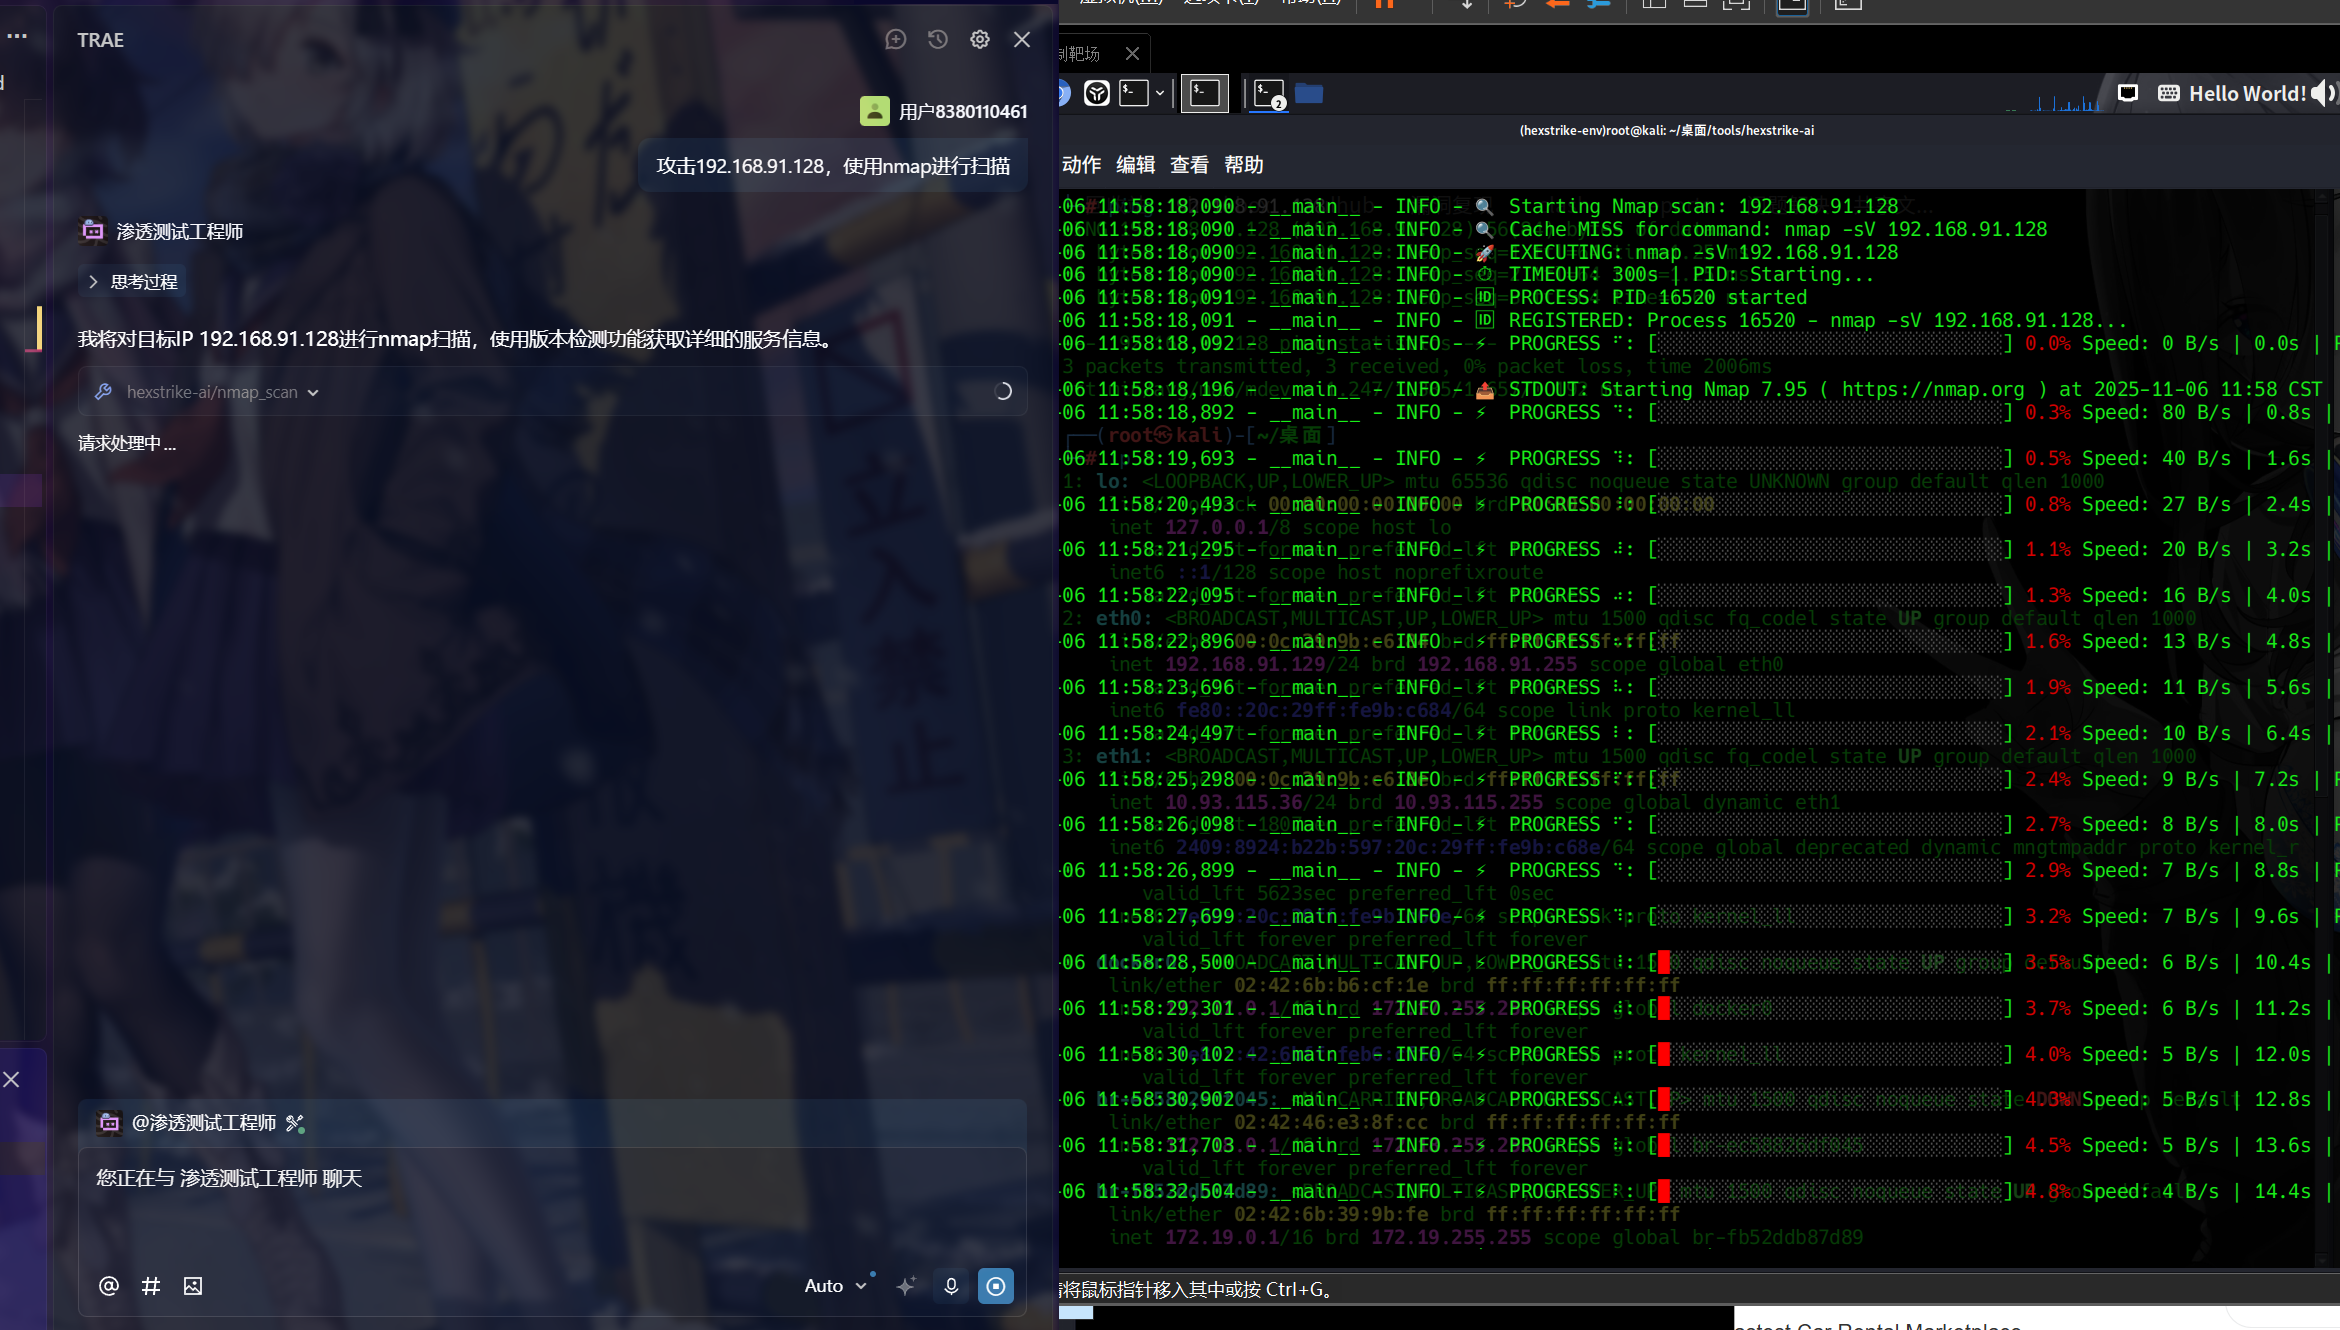
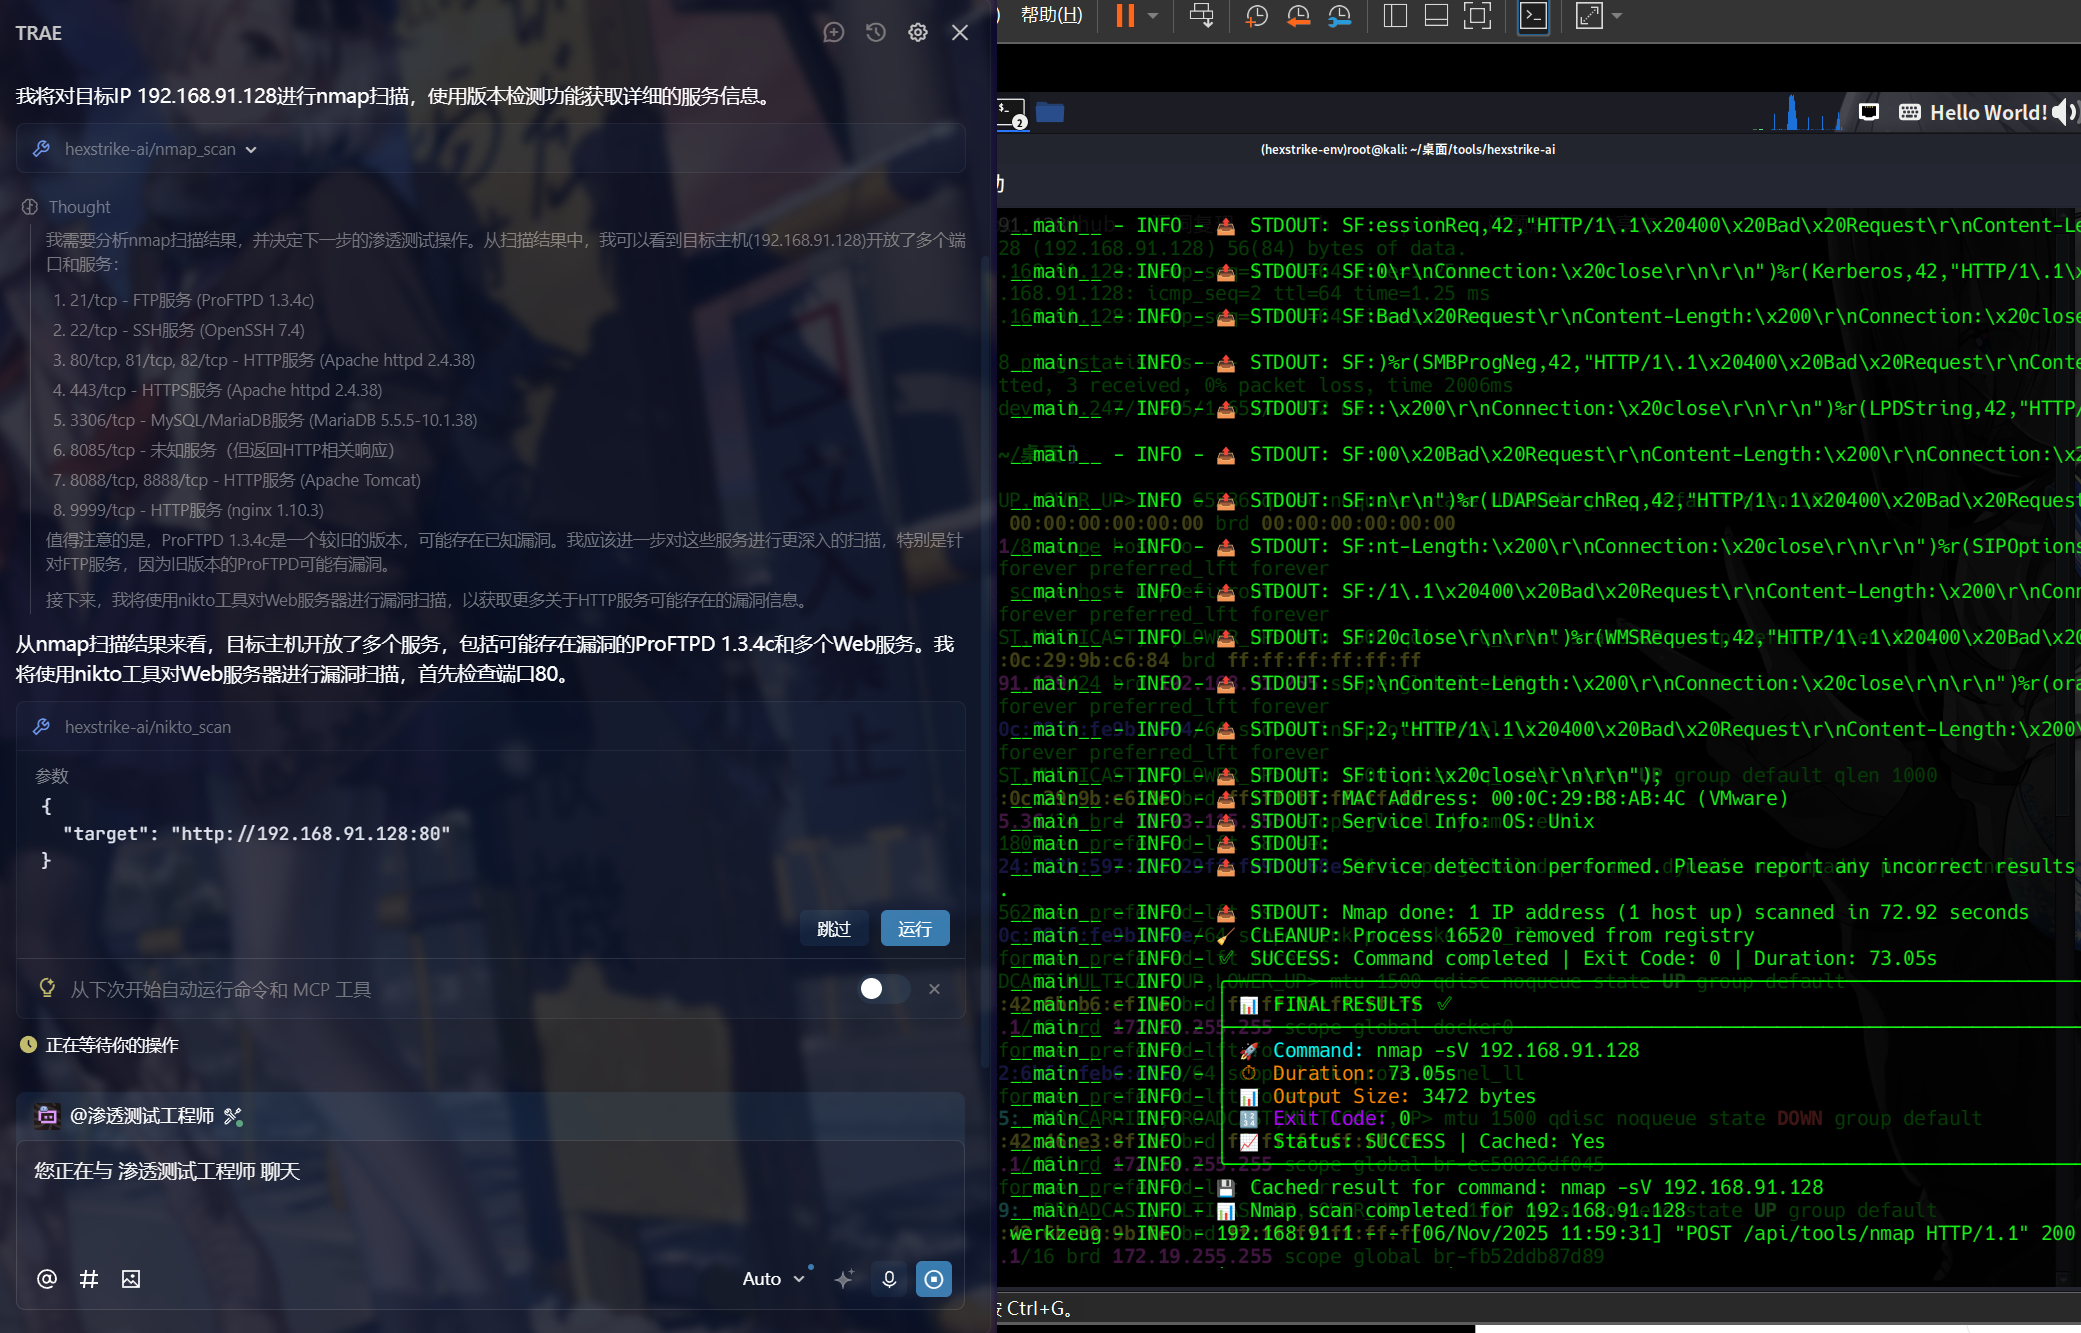
可以看到工具成功返回了nmap扫描结果,并给出了下一步的操作步骤,实现了完全自动化操作流程
进行调试:
https://help.aliyun.com/zh/api-gateway/ai-gateway/user-guide/debug-mcp-services
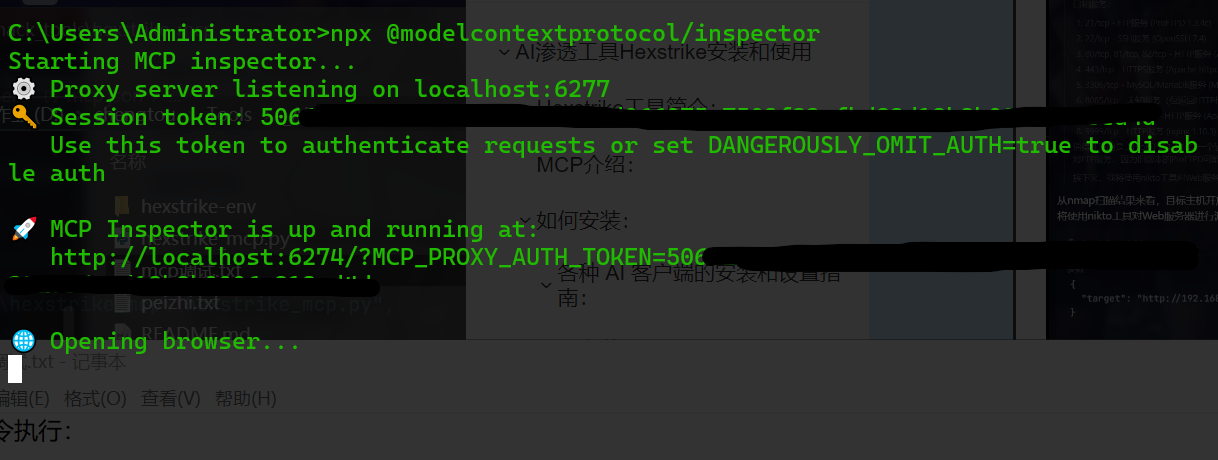
打开mcp调试工具进行调试:
cmd命令执行:
npx @modelcontextprotocol/inspector
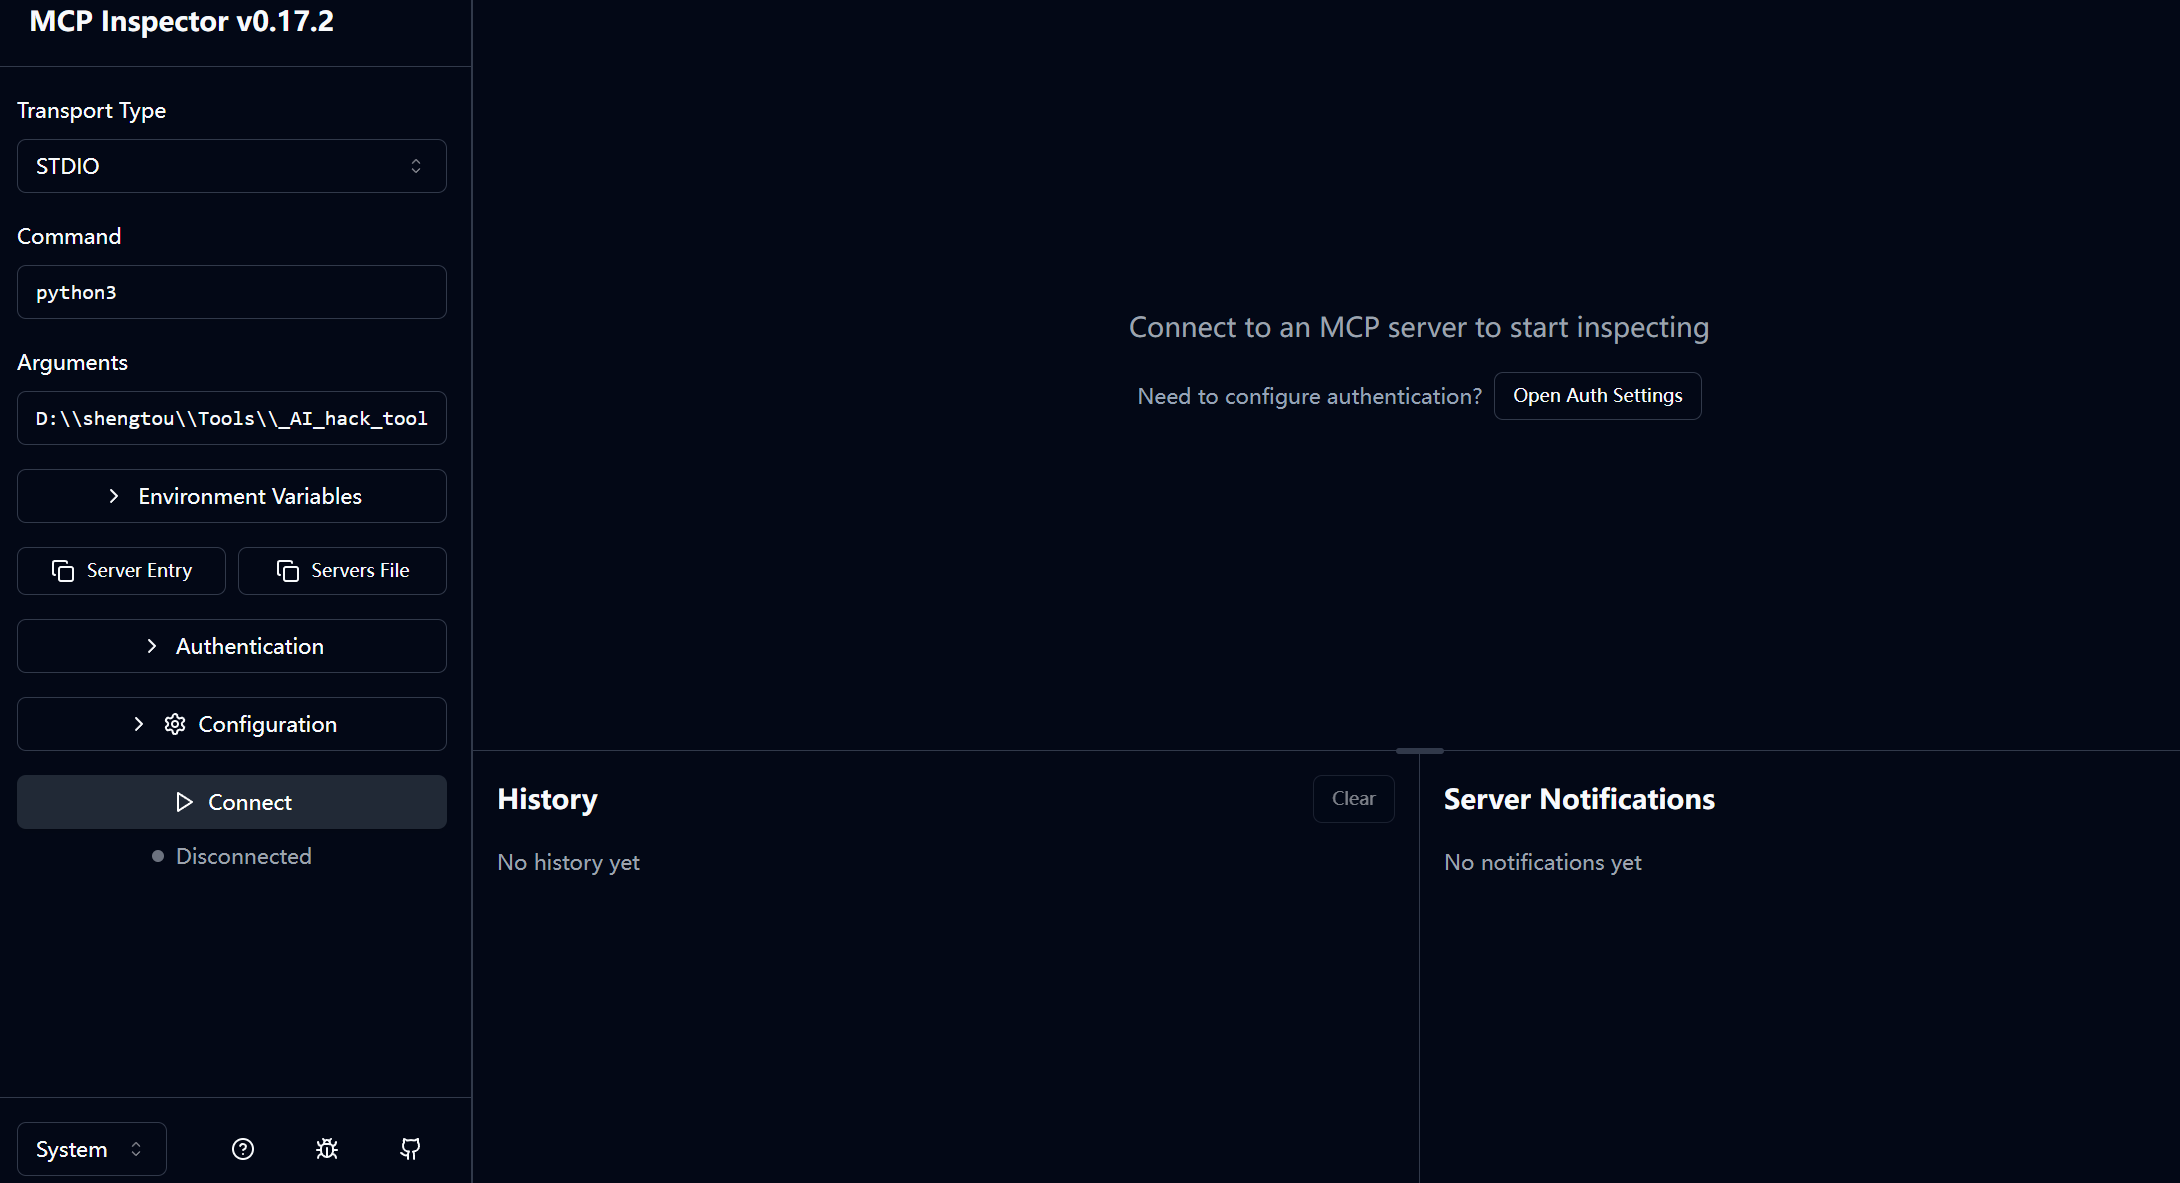
在Command和Arguments输入:
python3
D:\shengtou\Tools\_AI_hack_tools\hexstrike_mcp\hexstrike_mcp.py --server http://192.168.91.129:8888
后点击Connect连接,出现如下页面,表示连接成功。
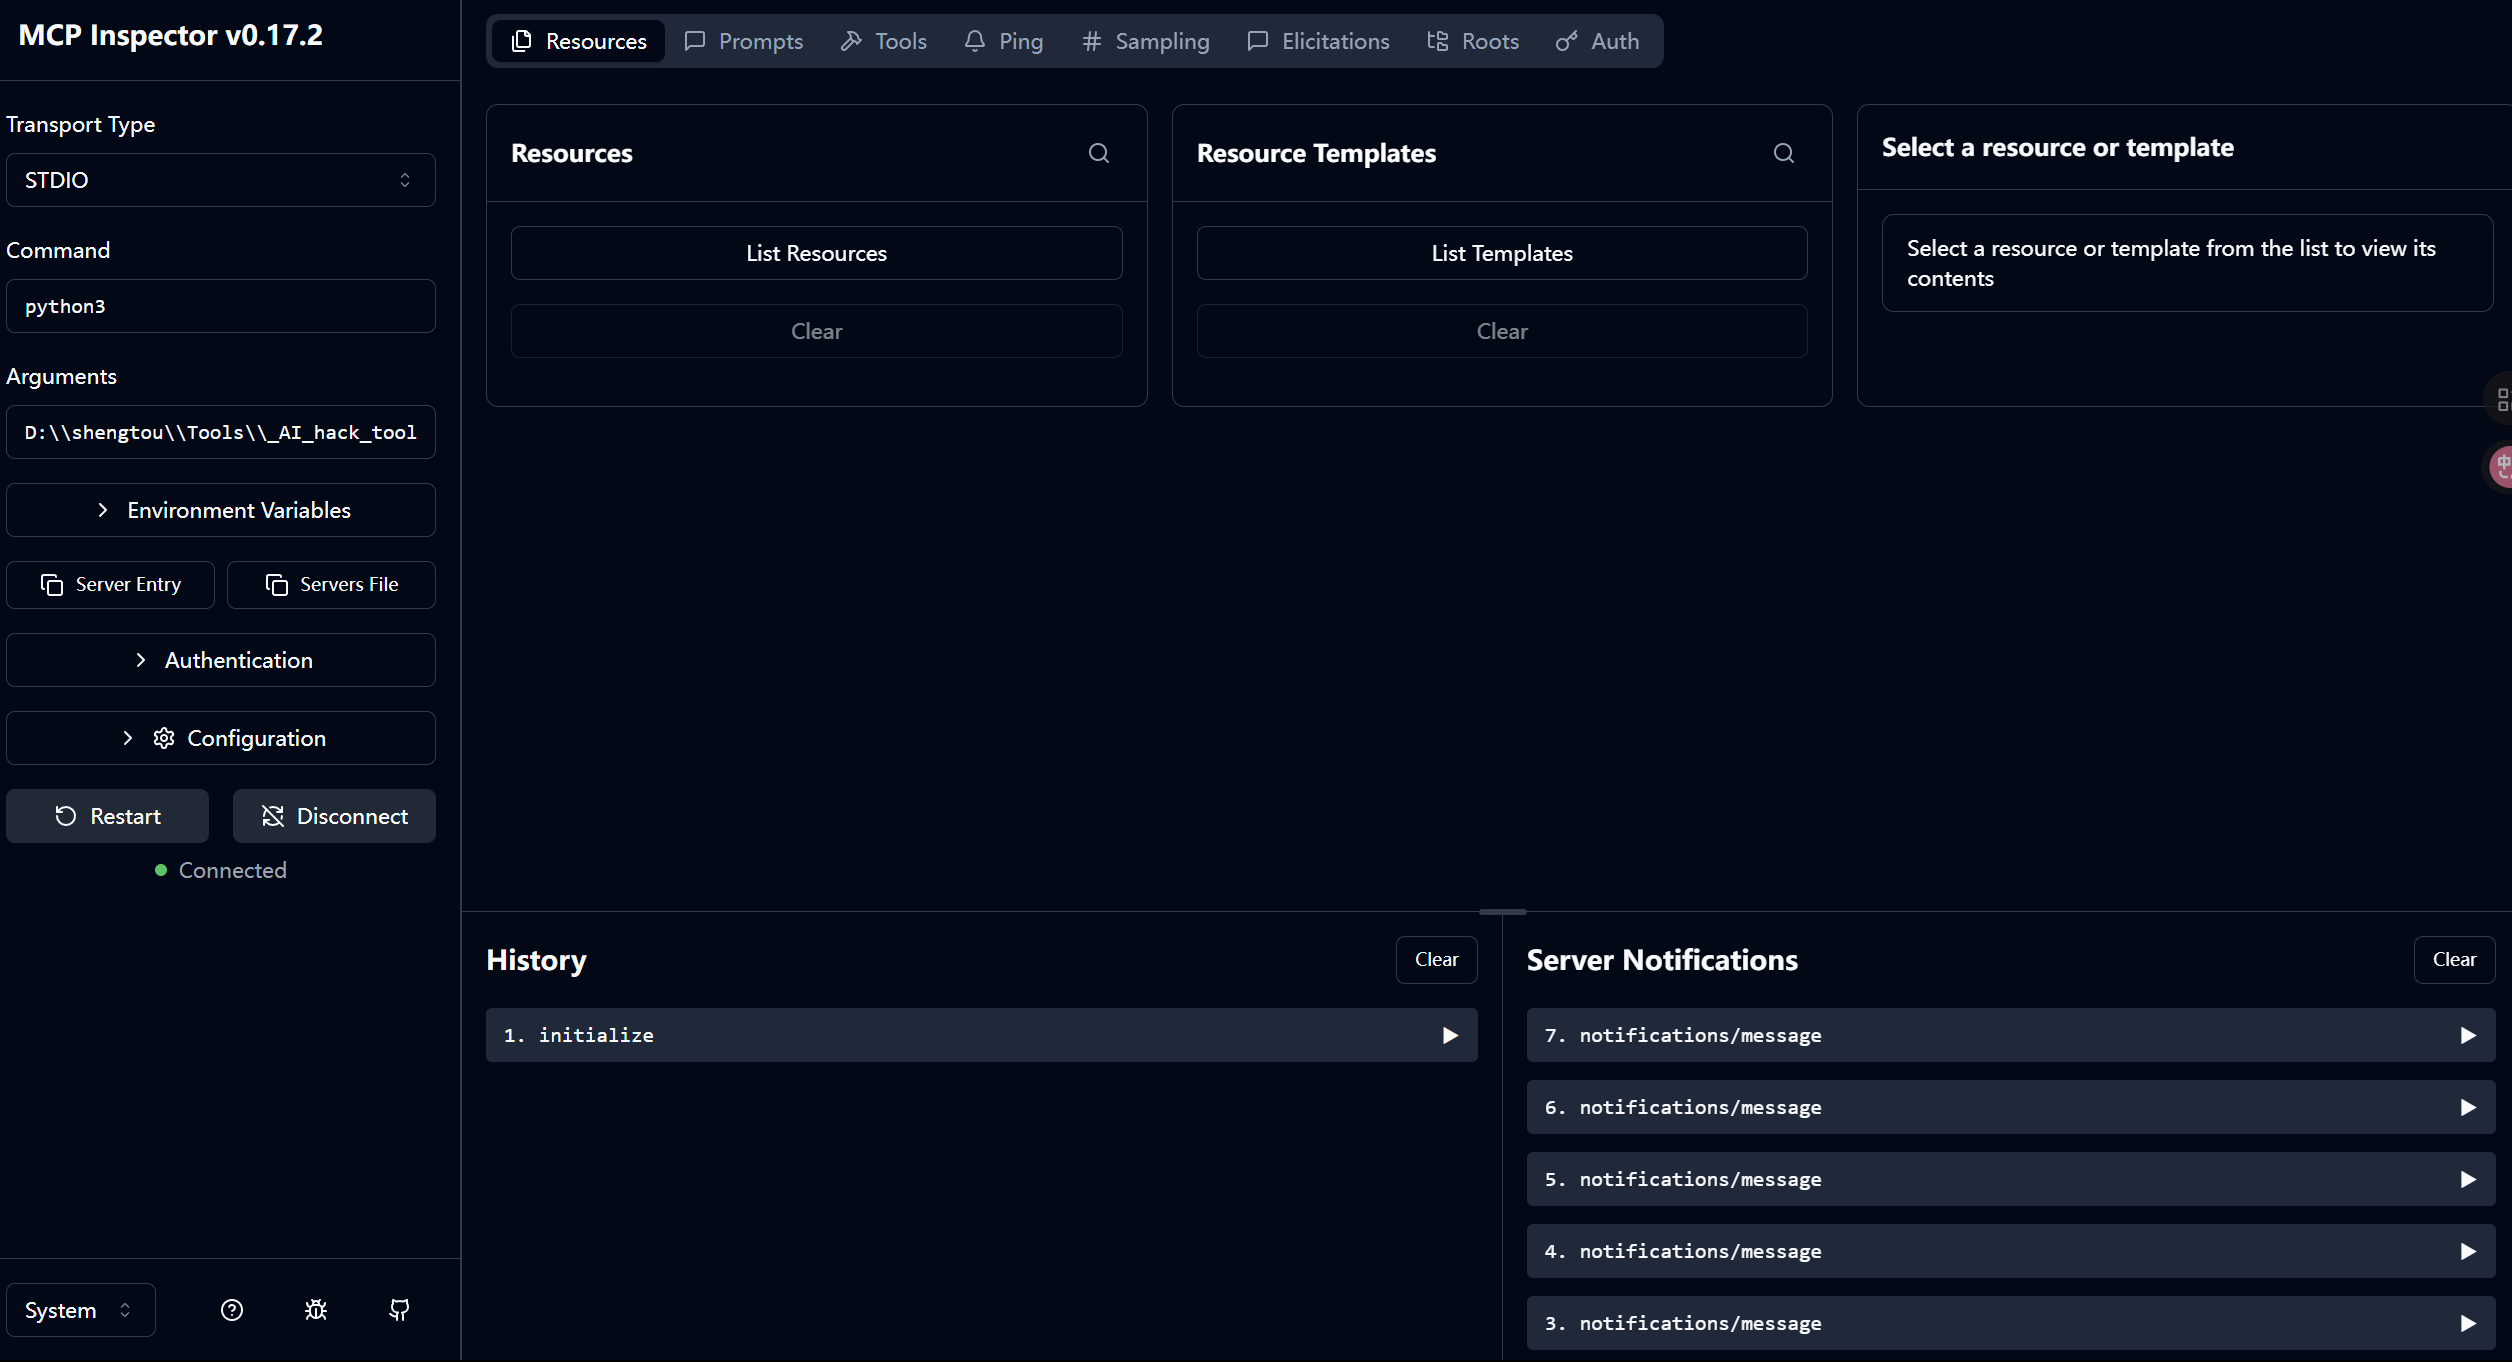
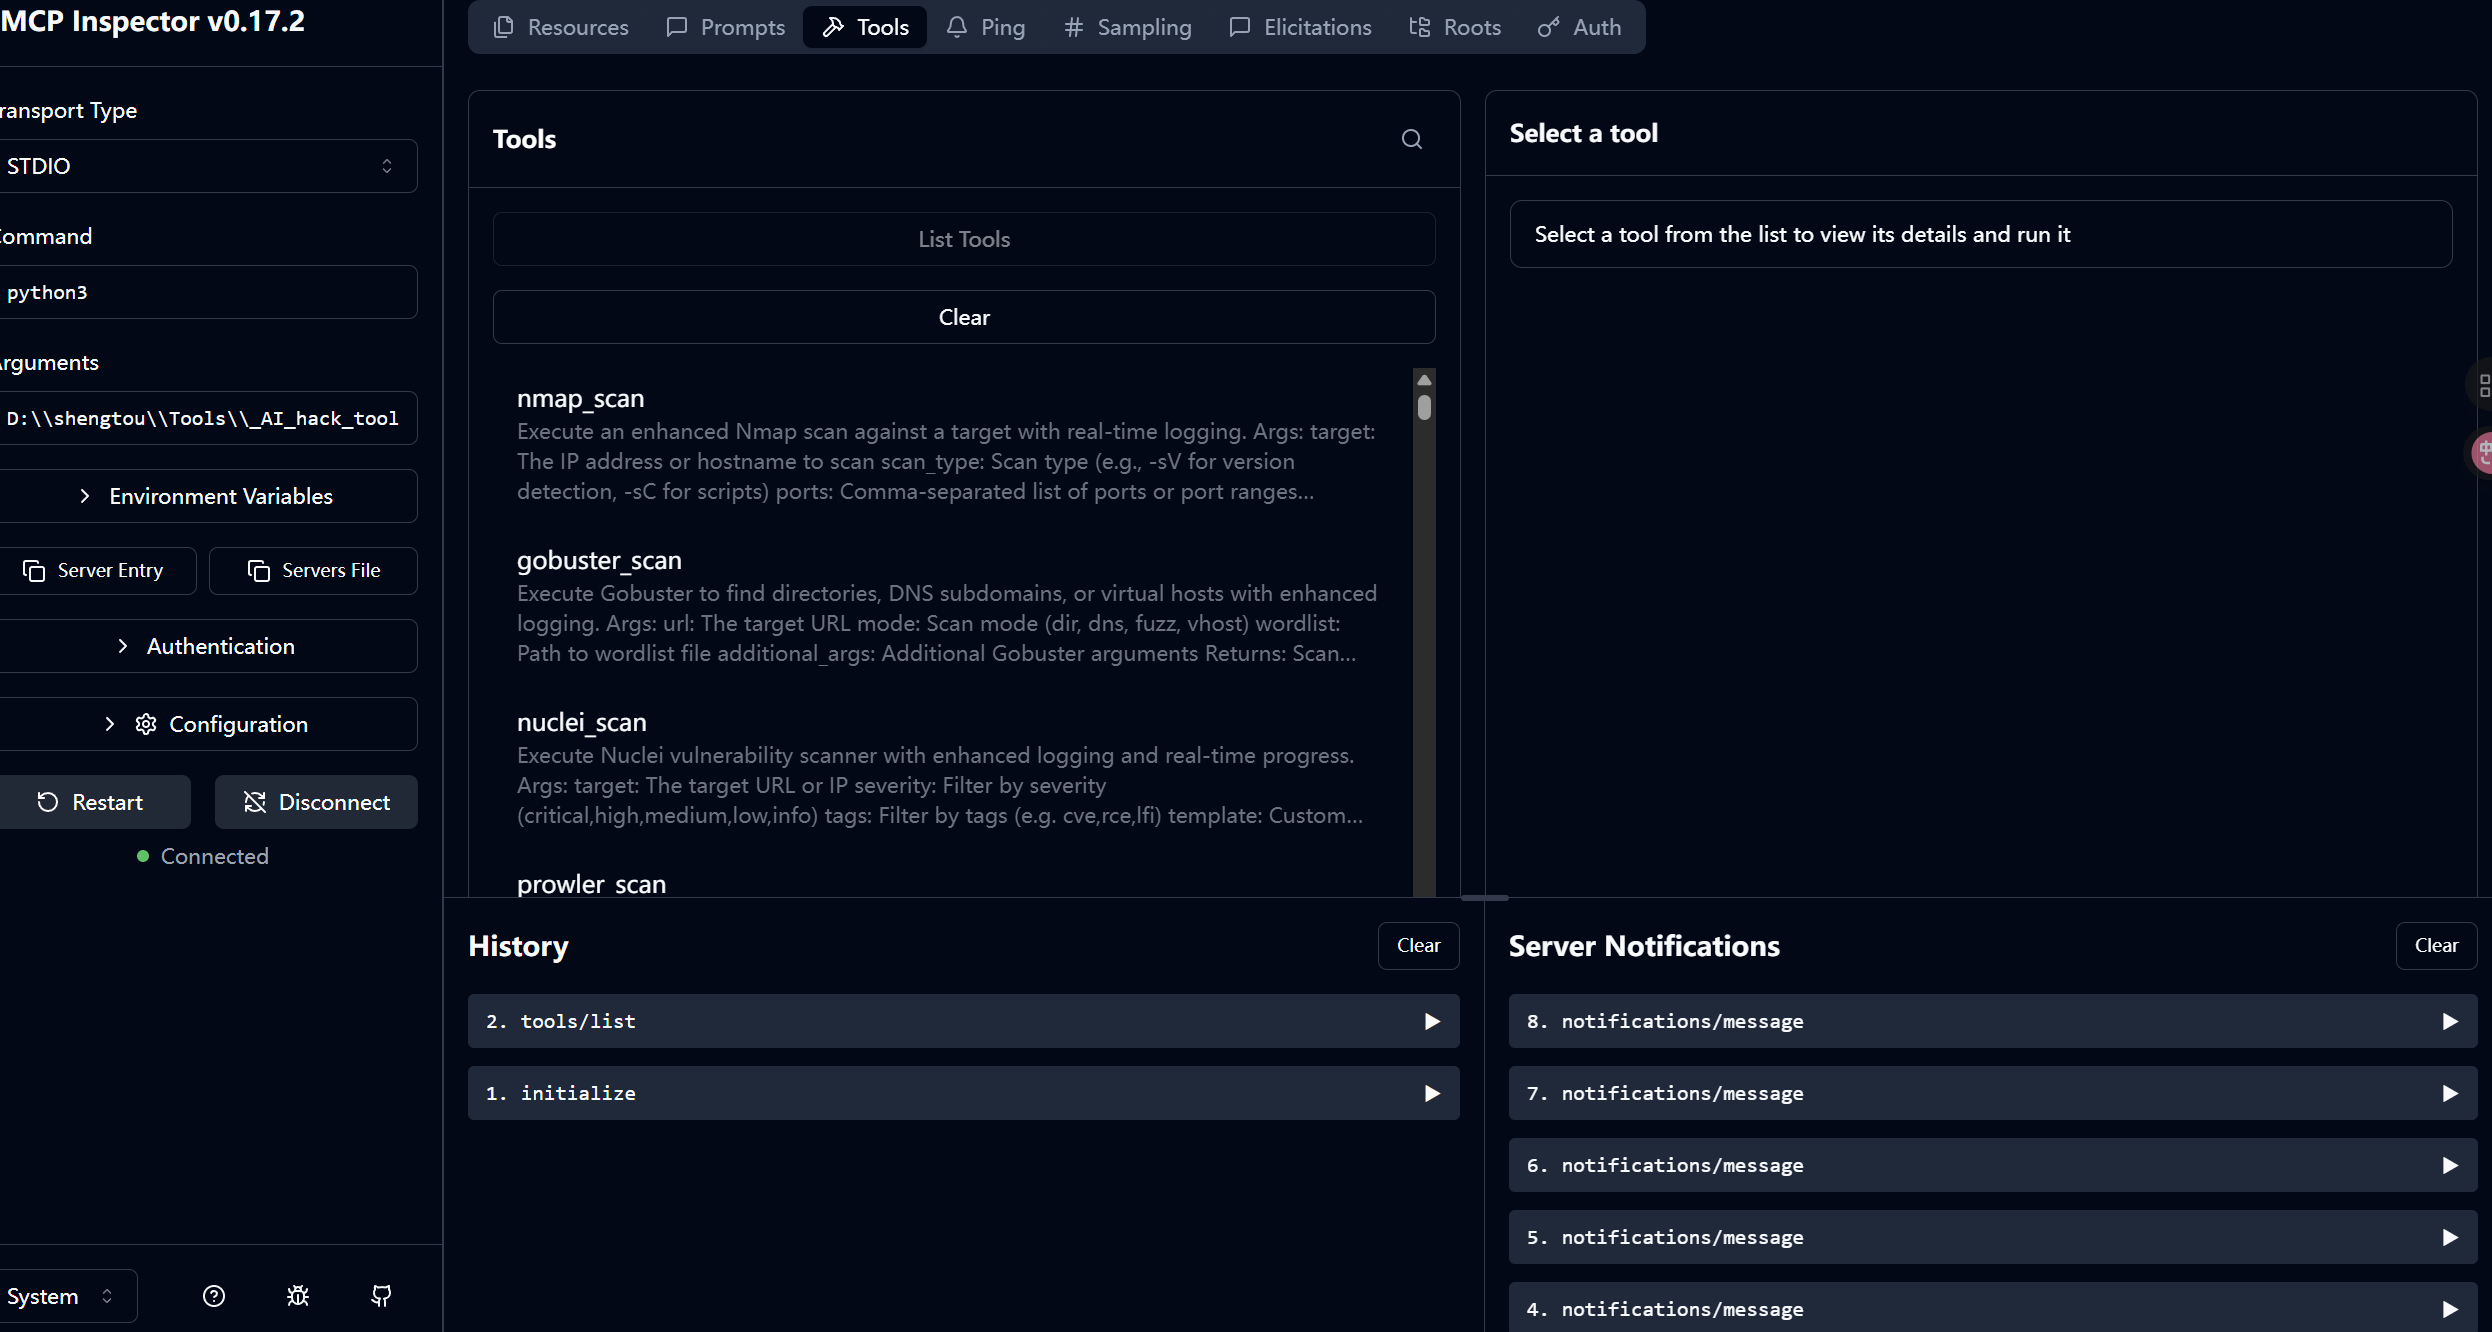
点击tools后点击List Tools列出工具列表,可以看到工具非常的丰富
配置Hexstrike开机自启服务
原文链接:https://blog.csdn.net/GodKay/article/details/154010029
前置条件
- Kali Linux 系统
- 已安装 HexStrike AI 框架
- root 用户权限
- Python 3 和 Flask 环境
步骤 1:创建 Web 界面文件
ctrl+alt+T打开kali终端,复制粘贴以下命令
# 进入 HexStrike 目录
cd /root/hexstrike-ai

# 创建 Web 界面文件
cat > web_interface.py << 'EOF'
#!/usr/bin/env python3
from flask import Flask, render_template_string
import datetime

app = Flask(__name__)

HTML_TEMPLATE = """
<!DOCTYPE html>
<html>
<head>
    <title>HexStrike AI</title>
    <style>
        body {
            font-family: 'Courier New', monospace;
            background: #0a0a0a;
            color: #ff4444;
            margin: 40px;
        }
        .container {
            max-width: 800px;
            margin: 0 auto;
            border: 2px solid #ff4444;
            padding: 30px;
            background: #111;
        }
        h1 { color: #ff4444; text-align: center; }
        .status {
            background: #1a1a1a;
            padding: 15px;
            margin: 20px 0;
            border-left: 4px solid #ff4444;
        }
    </style>
</head>
<body>
    <div class="container">
        <h1>⚡ HexStrike AI Server</h1>
        <div class="status">
            <strong>Status:</strong> <span style="color: #4CAF50;">● ACTIVE</span><br>
            <strong>Version:</strong> 6.0 - Enhanced AI Framework<br>
            <strong>Server:</strong> Running on port 8888<br>
            <strong>Time:</strong> {{ time }}
        </div>
        <p>Advanced Penetration Testing Framework with AI-Powered Intelligence</p>
        <p>Server is running successfully!</p>
    </div>
</body>
</html>
"""

@app.route('/')
def index():
    return render_template_string(HTML_TEMPLATE, time=datetime.datetime.now().strftime('%Y-%m-%d %H:%M:%S'))

if __name__ == '__main__':
    app.run(host='0.0.0.0', port=8888, debug=False)
EOF

# 确认文件创建成功
ls -la web_interface.py
步骤 2:创建 Systemd 服务文件
依旧是kali终端复制粘贴
# 创建系统服务文件
sudo nano /etc/systemd/system/hexstrike.service
将以下内容复制到文件中:
[Unit]
Description=HexStrike AI Web Server
After=network.target
Wants=network.target

[Service]
Type=simple
User=root
WorkingDirectory=/root/hexstrike-ai
ExecStart=/root/hexstrike-ai/hexstrike-env/bin/python3 /root/hexstrike-ai/web_interface.py
Restart=always
RestartSec=10
StandardOutput=journal
StandardError=journal

[Install]
WantedBy=multi-user.target
保存后退出
步骤 3:启用系统服务
kali终端复制粘贴下面的命令
# 重新加载 systemd 配置
sudo systemctl daemon-reload

# 启用开机自启动
sudo systemctl enable hexstrike.service

# 启动服务
sudo systemctl start hexstrike.service

# 检查服务状态
sudo systemctl status hexstrike.service
验证测试
测试 1:服务状态检查
sudo systemctl status hexstrike.service
预期结果: 显示 active (running)
测试 2:Web 界面访问
# 命令行测试
curl http://127.0.0.1:8888/

# 浏览器测试
echo "请在浏览器中访问: http://127.0.0.1:8888/"
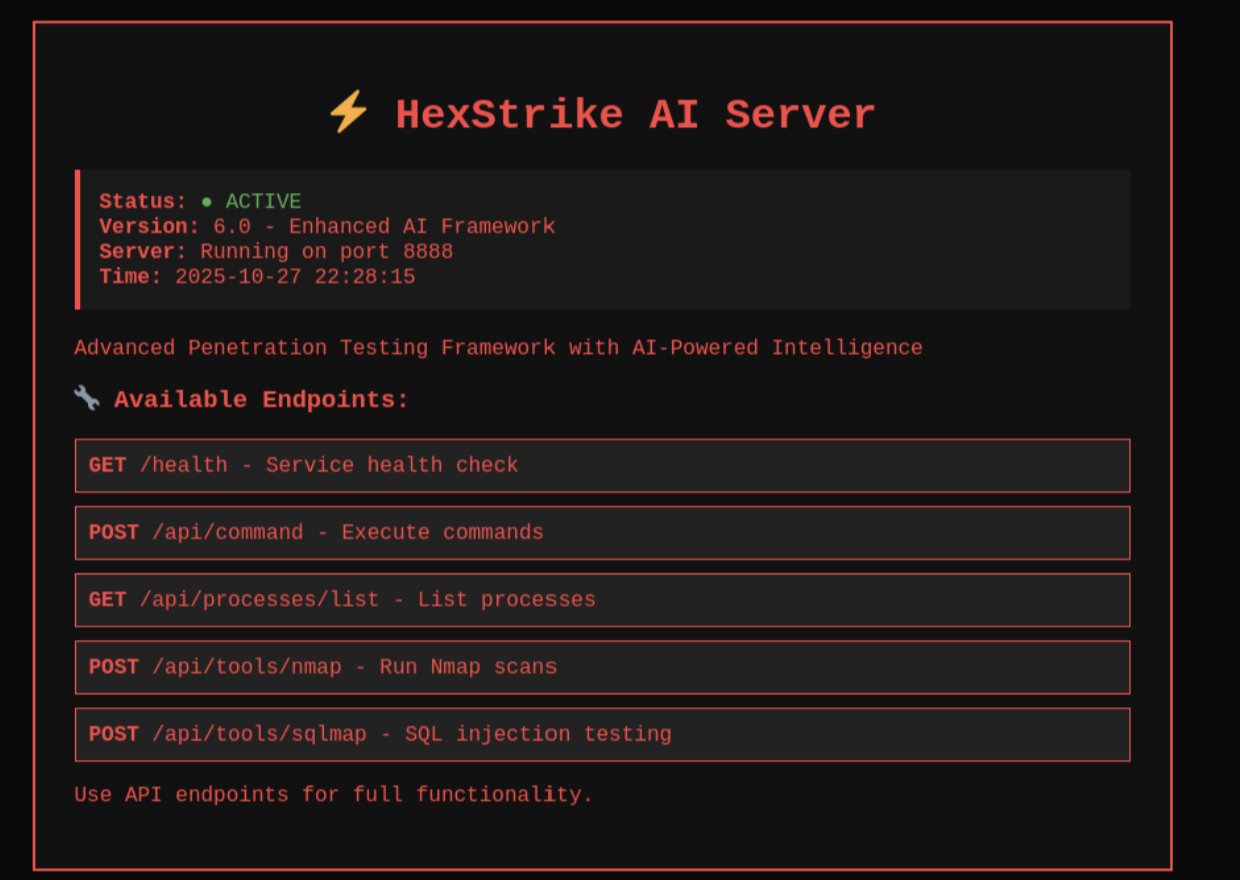
预期结果: 返回 HTML 页面内容
预期结果: 服务自动启动且在浏览器可正常访问127.0.0.1:8888/,出现以下web界面
测试 3:重启验证
# 重启系统
sudo reboot

# 重启后检查
sudo systemctl status hexstrike.service
curl http://127.0.0.1:8888/
故障排除
问题 1:服务启动失败
# 查看详细日志
sudo journalctl -u hexstrike.service -f

# 检查服务文件语法
sudo systemctl cat hexstrike.service
问题 2:端口被占用
# 检查端口占用
sudo lsof -i :8888

# 强制停止占用进程
sudo kill -9 $(sudo lsof -t -i:8888)
问题 3:Web 界面显示 404 错误
# 手动测试 Web 界面
cd /root/hexstrike-ai
source hexstrike-env/bin/activate
python3 web_interface.py
问题 4:Python 环境问题
# 检查 Python 环境
cd /root/hexstrike-ai
source hexstrike-env/bin/activate
python3 --version
pip list | grep Flask
服务管理命令
基本管理命令
# 启动服务
sudo systemctl start hexstrike.service

# 停止服务
sudo systemctl stop hexstrike.service

# 重启服务
sudo systemctl restart hexstrike.service

# 查看状态
sudo systemctl status hexstrike.service

# 禁用开机启动
sudo systemctl disable hexstrike.service
日志查看命令
# 查看最近日志
sudo journalctl -u hexstrike.service -n 20

# 实时查看日志
sudo journalctl -u hexstrike.service -f

# 查看指定时间段的日志
sudo journalctl -u hexstrike.service --since "2025-10-27 22:00:00"
服务信息查询
# 检查服务是否启用
sudo systemctl is-enabled hexstrike.service

# 查看服务依赖关系
sudo systemctl list-dependencies hexstrike.service

# 查看服务资源使用
sudo systemctl show hexstrike.service
附录
文件位置说明
| 文件/目录 | 路径 | 说明 |
|---|---|---|
| 服务配置 | /etc/systemd/system/hexstrike.service |
系统服务配置 |
| Web 界面 | /root/hexstrike-ai/web_interface.py |
Web 界面主文件 |
| 虚拟环境 | /root/hexstrike-ai/hexstrike-env/ |
Python 虚拟环境 |
| 日志文件 | 系统日志 | 通过 journalctl 查看 |
成功标志
✅ systemctl status 显示 active (running)
✅ curl 测试返回 HTML 内容
✅ 浏览器可正常访问界面
✅ 系统重启后服务自动启动
注意事项
确保防火墙允许 8888 端口访问
定期检查服务日志以确保正常运行
更新 HexStrike 时可能需要重启服务
总结
HexStrike AI 是一个革命性的人工智能驱动的进攻性安全框架,它将专业安全工具与自主人工智能代理相结合,提供全面的安全测试功能。 HexStrike AI 基于多代理架构构建,利用智能决策、实时漏洞分析和高级自动化,彻底改变安全专业人员处理渗透测试、漏洞赏金搜寻和 CTF 挑战的方式。
虽然体验下来有亮点,也发现几个实际场景中的问题,大家要理性看待:
**真实环境受限:**在真实漏洞挖掘(比如漏洞赏金)中,容易触发目标网站的风控,比如频繁扫描会被封 IP;
**需要 “调教”:**AI 决策不是 100% 对,比如有的低风险漏洞会误判为高风险,需要手动调整规则,前期投入时间不少;
CTF 比赛用不上:大部分 CTF 禁止联网,而 HexStrike 部分功能需要联网获取漏洞情报,等于被禁用;
**Pro 版本排队:**免费版模型请求会排队(我最多排到 98 位),想快就得买 Pro,有成本门槛。
扩展玩法:接入更多 AI 大模型
HexStrike 还有个隐藏功能:可以接入第三方大模型,提升 AI 决策能力。在客户端「模型管理」里,能添加 Claude-3.7、Gemini-2.5-Pro、GPT-4o 这些主流模型,只需要填 API Key 就行。
我试了接入 GPT-4o,发现它对漏洞的分析更细致,比如文件上传漏洞会给出多种绕过思路,比默认模型更灵活,适合复杂场景。
它适合谁?不适合谁?
适合人群:刚入门的渗透测试工程师(减少手动操作)、靶场练习者(快速验证漏洞)、需要批量做基础扫描的团队;
不适合人群:追求极致效率的漏洞猎人、CTF 参赛选手、需要深度定制化测试的场景。
总的来说,HexStrike 6.0 不是 “颠覆性工具”,更像一个「安全人的辅助助手」—— 能帮你省掉重复工作,但核心的漏洞分析、利用思路还是得靠人。期待下个版本能优化风控规避和离线模式,那样实用性会更高。
- 感谢你赐予我前进的力量
-
微信
- 支付宝